
 Il y a aussi une version en fran√Іais de ce didacticiel
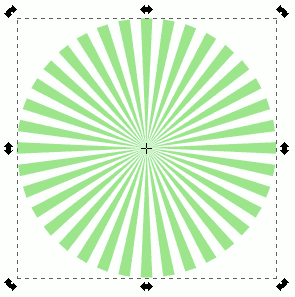
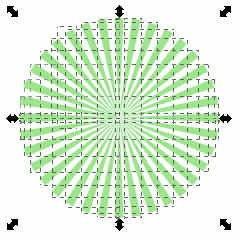
 Here is a tutorial for creating with Inkscape an object looking like a naive radating sun like this:
WARNING!!! A bug in the 0.45.1 (corrected in the SVN) with tile clone and barycentre, don’t allow to do this tutotial. You can install developpement version if you really want to do this, but avoid to use it for your everydays works.
We start by creating a triangle like this with 3 nodes, using the Bézier curve/segment tool ( b key):

We can see (after changing to selection mode (s key) and then clicking on the triangle ( (or clicking 2 times if the triangle was deselected), than the barycenter (the little cross which is located at the rotation center) is at center…
We have then to move it to the right node of the triangle that will be used as sun center. For that, press the alt key that is used to select cross (alt is not really useful here, but it is when some nodes are at the same place than the cross), then move it with mouse. Using the ctrl key will help you to move it horizontally, to put it precisely on the right node of the triangle.

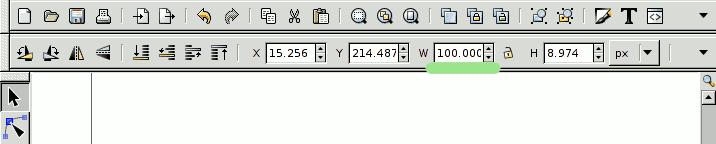
Before duplicate this triangle, we have a last thing to do, get its width (given in the W as width widget, at the upper tool bar (see screenshot below). I choosed to scale it to 100 by entring 100 in this field.
We will now duplicate the triangle with simultaneously applying rotation to obtain desired shape. We have to go to the menu Edit=>clone=>create Tiled Clones. We will keep the P1 – translation mode. It should be better, if this tool was already used with special parameters, to press the reset button at the button left of the window.
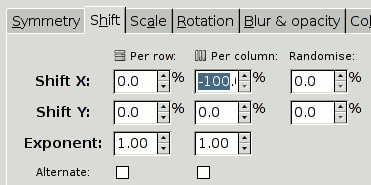
We have then to to click on shift tab, then in the per column field to enter the negative value corresponding to the width of the triangle (-100 in my case). This will allow to compensate the shifting by object width done by this tool by default in P1 – translation mode:
WARNING!!! The 0.45(.1) version could has a bug with barycenter, the center of the object keep used for rotation in our case. The solution, is to use the half-width of the triangle (-50 in our case).
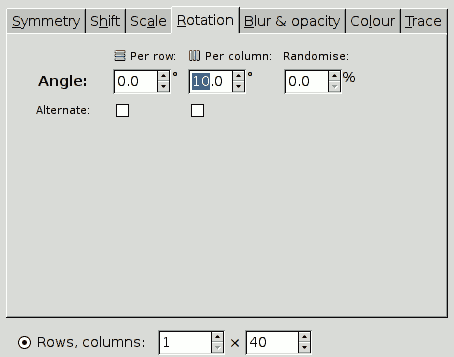
We have now to fill in the Rotation tab, the rotation added at each column (per column, as colored in the screenshot), then in function of this parameter, the number of desired clones by column (at right button):
We still have to press the Create button to see the final result. We still can press Remove button to come back if this is not the wanted result, then change parameters values, and click again on Create.
We have now the wanted figure, the next part of this tutorial is about to fusion objects created to have a uniq shape, which is easier to manipulate in lot of case. Instead we can now, change simultaneously the shape of all the triangles of this rounded shape by editing original shape (under the left one).
We will now fusion the clones, to have only one object to manipulate.
For that, we must :
* Select both objects (menu Edit>select all or ctrl+a key). We can see here there are lot of objects:
* Unlink both clones (menu Edit=>Clone=>Unlink Clone or shift+alt+d keys)
* Fusion the final object (menu Path=>Union or ctrl++ key)
Et voila, we now have got our object ready to be manipulated, we can eventually add a circle shape at the center to have a japan like red sun.