
 Il y a une traduction française pour ce didacticiel
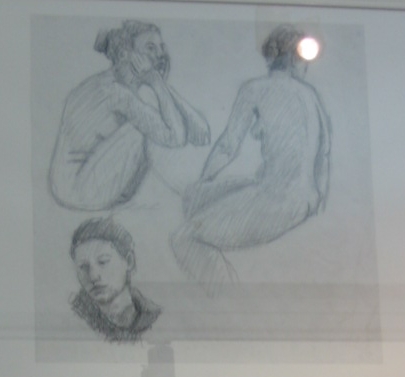
 For the end year exhibition invitation of my painting workshop, the teacher have only got one photography of last year painting, in low resolution and where the sketch was only in little part of the photography, too dark, and too blur. I then ask her if I can correct this picture using Gimp.
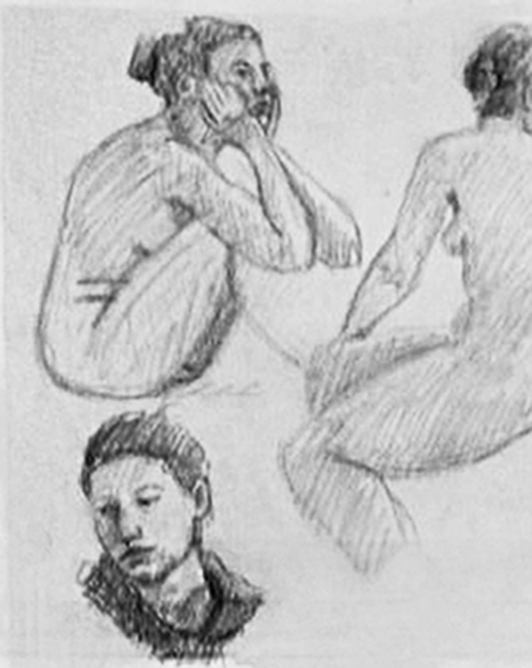
Here you can see orginal photography and te picture after gimp (and Gliv) modification. The resulting image is a little bit too computerized for screen, but is more clean after printing (less than 10 cm high).
Sharping
I used sharpen and unsharp mask to made the picture a little bit less blurry.
Zoom
To get a very high quality and precise picture, instead of using Gimp, I saved the picture in PNG format (to avoid loss of informations), and reopened it with Gliv, an OpenGL picture viewer. Using OpenGL allow to have a really fine zoom using graphic card hardware. The quality of the zoom is very excellent, really fast and responsive. You can zoom/rotate/move the picture with the mouse at exactly the size you want. This allow to chose quickly the better ration Big-square-pixel/good precision. After that, I capture the zoomed picture with gimp screenshot function to continue the work.
Cleaning glass reflections
 The next step is to remove reflections of room in the glass from the drawing. I uses the Clone Tool (C key) with about 20-30% of opacity, allowing to remove finely by duplicate other part of the picture. The most difficult part is on stroke on the leg of the model at the right, a littler brush for the clone tool allow to mostly correct this.
enlightenment
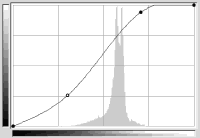 The last but not so easy step is to render the picture less dark. For this :
* Duplicate the layer
* Use curve to enlight it. A light hallow comming from a window at the right become more visible with this enlightenment.
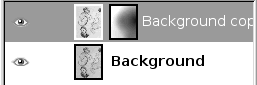 Then, a solution is to add a white layer mask on this lighter layer.
* On this layer mask, uses gradient tool (L key) with black color to transparent with radial shape and low to medium opacity to make circles until the picture become more homogeneous.
* When the result is OK, flatten the picture.
* Then eventually restart the operation several times.
Et voilà the image is ready for printing.