

Comme on me le demande parfois, je fais un mini tuto en image pour installer le support du chinois sur Galaxy Note II. C’est plus simple que sur d’autres systèmes Android.
* Ajout du clavier chinois
* Afficher tout le système en chinois
* Envoie de SMS en chinois
Mise à jour 9 décembre 2012 : Le clavier (application libre) OpenWnn est un peu mieux que celui de Samsung où des caractères courants comme 龙 (dragon), manquent. Il permet la saisie ne chinois simplifié (méthode pinyin), chinois traditionnel (méthode bopomofo/zhuyin) et japonais (méthode hiragana).Lien f-droid.org, OpenWnn.apk.Fin de l’ajout
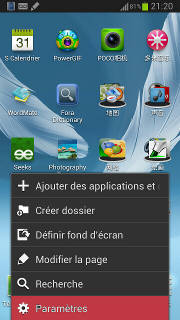
Depuis l’écran de démarrage, appuyer sur la touche en bas à gauche, en dessous de l’écran, touche menu :

apparaît alors le menu suivant, où il faut choisir Paramètres :
Puis, suivre la séquence suivante :
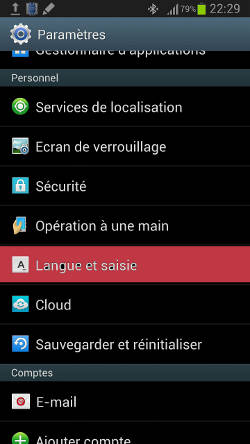
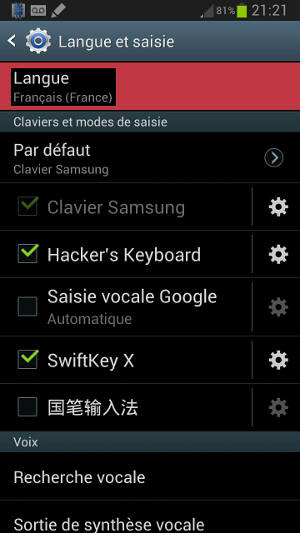
* Langue et Saisie :
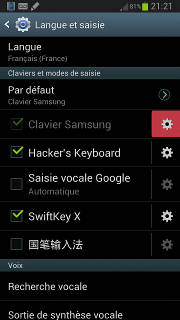
* Engrenage à droite de Clavier Samsung (est remplacé par clavier Google en version chinoise ???) :
* Une alerte rappelant que vous pouvez mettre à jour les données linguistiques à tout moment, faites OK
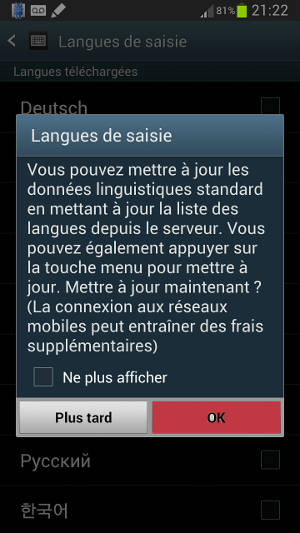
* Une liste apparaît alors, ajouter 中文 en appuyant dessus :
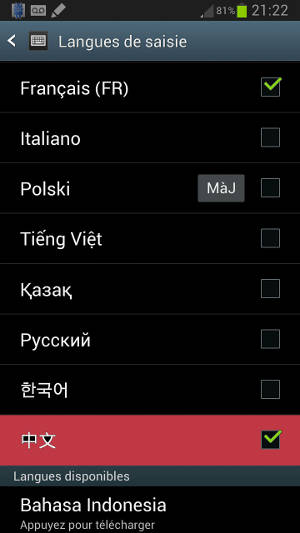
La petite icône [MàJ] à côté de Polski sur la capture d’écran signifie qu’une mise à jour est disponible pour le polonais, appuyer dessus mettra donc à jour cette langue.
Et voilà, le chinois est configuré. Vous pouvez sortir des paramètres en appuyant sur le gros bouton Home/maison situé en bas du téléphone, au milieu.
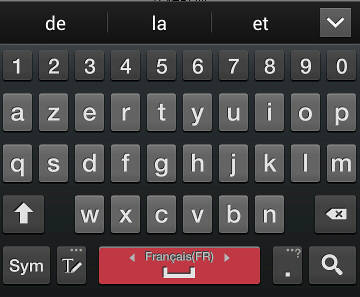
Il reste encore à l’utiliser. Allez pour faire apparaître le clavier de la langue courante dans n’importe quel endroit où vous pouvez saisir du texte, puis…
Pour changer de langue sur le clavier Samsung, il suffit de presser longuement sur la barre d’espace et de se déplacer à gauche ou à droite, plusieurs fois le mouvement dans la même direction peuvent être nécessaire si il y a plusieurs langues :
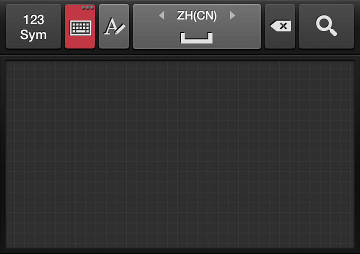
Et voila le mode pinyin chinois :
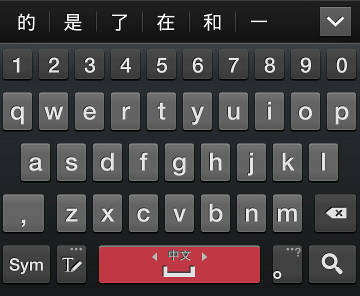
Vous pouvez également basculer en mode écriture manuscrite en appuyant sur le petit crayon à gauche de la barre d’espace :
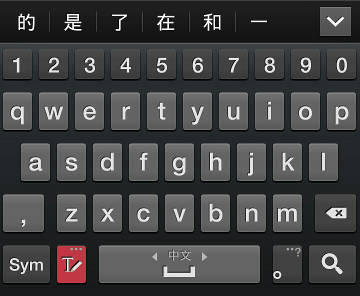
et depuis le mode manuscrit, pour repasser en mode pinyin, cliquer sur l’icône clavier :
Afficher tout le système en chinois
Si vous désirez ensuite que tout le système soit en chinois, il faut suivre la démarche suivante (qui commence comme la précédente) :
depuis l’écran de démarrage, appuyer sur la touche en bas à gauche, en dessous de l’écran, touche menu :
apparaît alors le menu suivant, où il faut choisir Paramètres :
Puis, suivre la séquence suivante :
* Langue et Saisie :
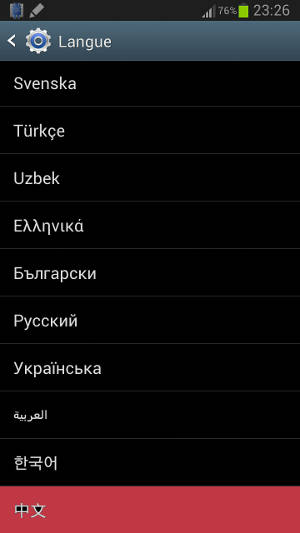
Choisir Langue :
Descendre à 中文 (zhongwen), qui est dans les z :
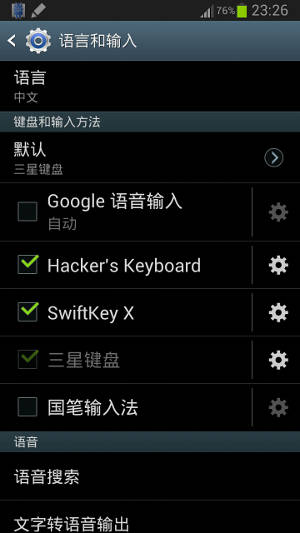
Et voila le système en chinois, ne paniquez pas si vous ne connaissez pas le chinois, appuyez de nouveau sur le premier bouton pour remettre en français. Attention, dans l’ordre des claviers clavier Samsung est remplacé par la saisie vocale Google (Google语音输入) et la méthode de saisie vocale est remplacée par le clavier Samsung (三星键盘)。
Par défaut, le réglage des SMS est bloqué sur un mode qui ne supporte que les caractères latin, du coup si vous écrivez à un contact en utilisant des écritures non latines, celui-ci lira des petits carrés à la place des caractères. Ce n’est pas le cas dans les applications de babillage ou courriel que j’ai pu tester.
Pour résoudre ce problème, il faut aller dans l’application « messages » (utilisé pour les SMS et MMS)

Appuyez ensuite sur le bouton menu de votre téléphone
Sélectionnez paramètres

Puis dans la partie Paramètres SMS, pressez Mode de saisie

Puis choisissez Unicode. Il est possible qu’Automatique fonctionne aussi, je n’ai pas essayé.


